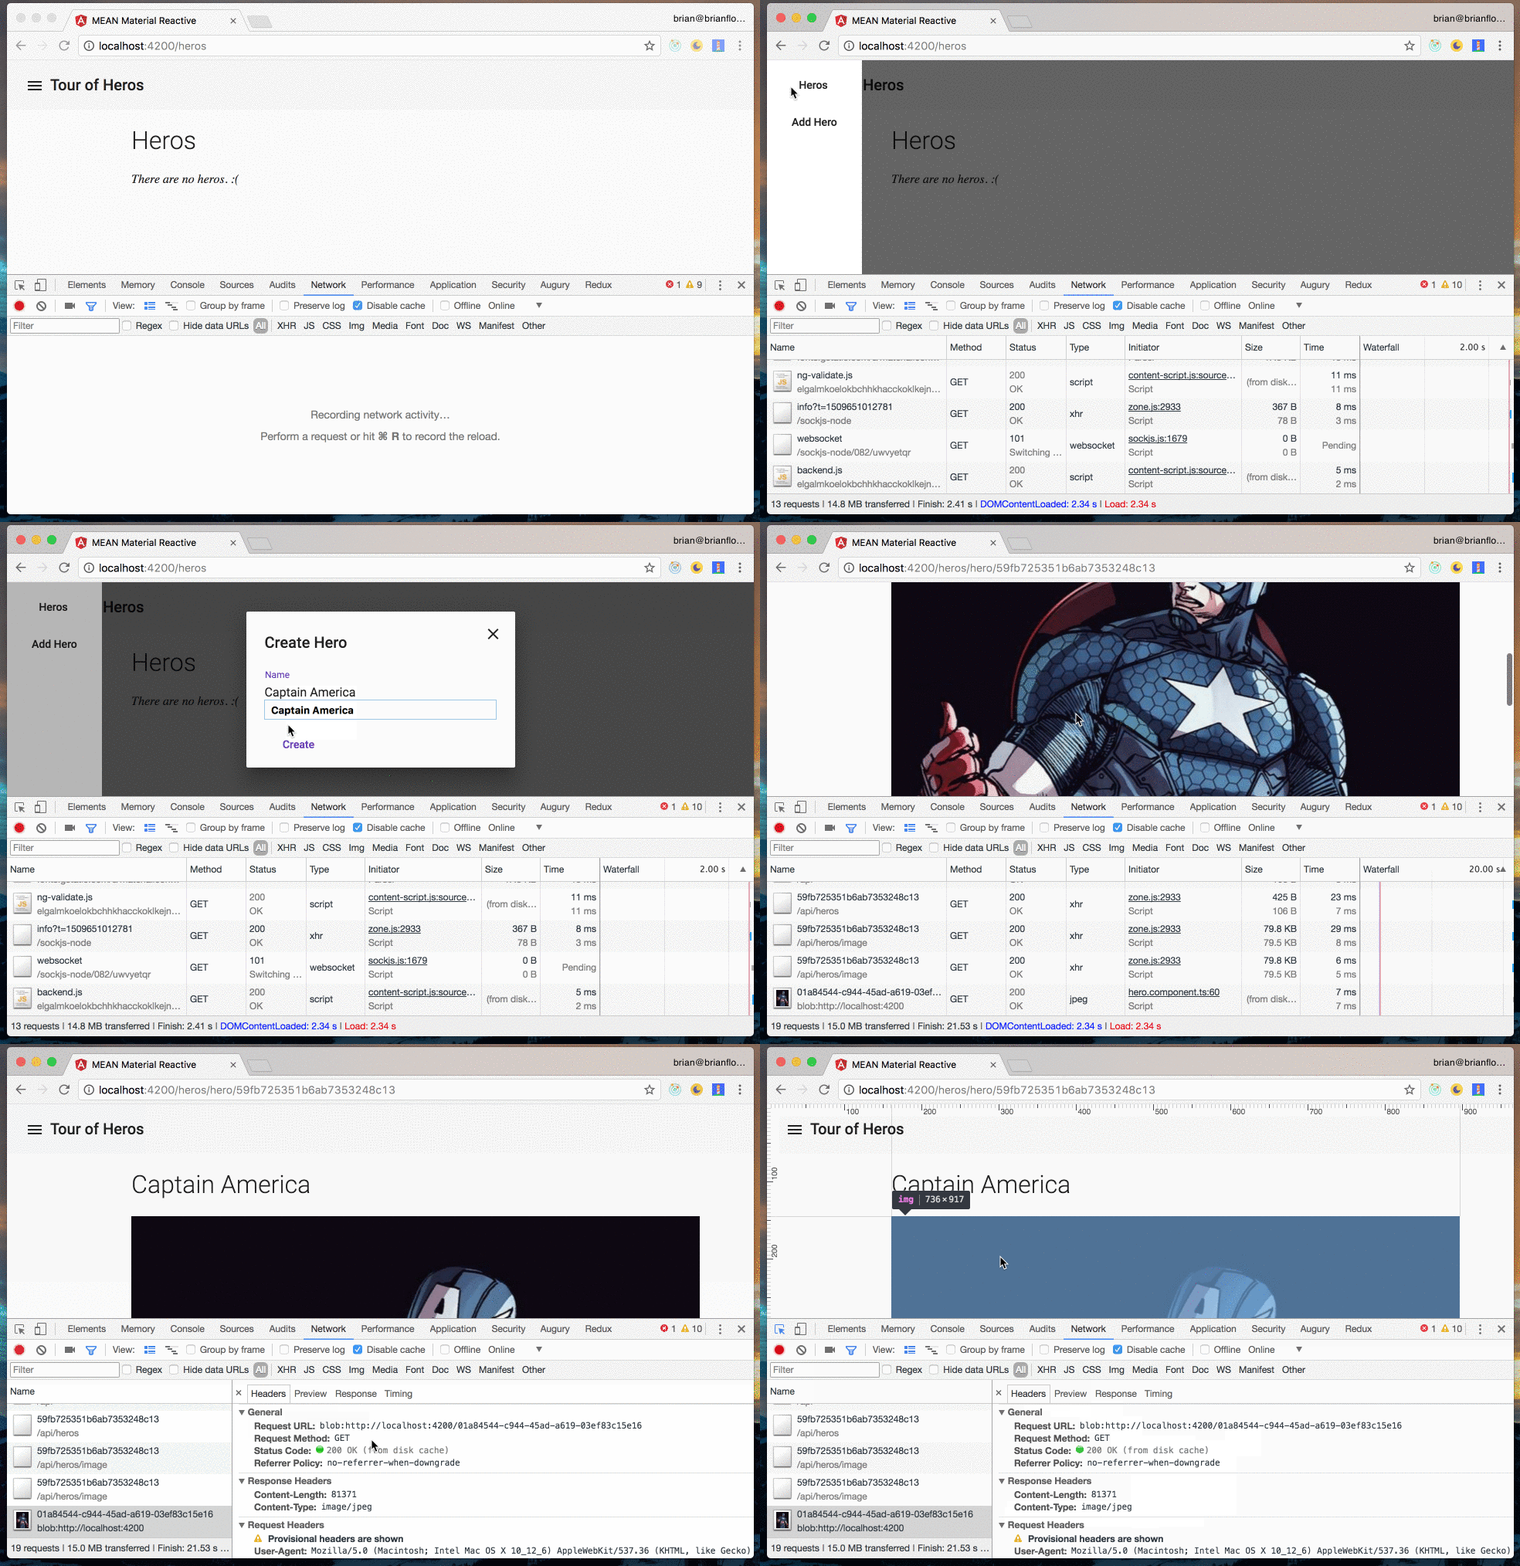
Using Angular’s HttpClient “blob” response type to display an image.
Demo

Source Code
You can download the source code and follow along or fork the repository on GitHub:
Install
First, install dependencies:
$ npm installNext, run the gulp tasks, and then start the Node.js Express server.
$ gulp
$ chmod +x ./dist/bin/www
$ ./dist/bin/www
Then, serve the Angular client using the CLI:
$ npm startGoals
- Create a simple Express Node.js HTTP server.
- Mock an image/jpeg REST API response.
- Create a simple Angular application to display heros.
- Viewing a hero displays the hero’s name and associated image. Again, the image is always the same since I hacked this portion.
- Show how to retrieve the JPEG image using the
HttpClientwith theresponseTypeoption set to “blob”. - Show the image.
Server
Let’s briefly look at the Node.js server code. The code is written in TypeScript and compiled to JavaScript, and then executed with Node.js. All of the server code is in the root /server directory.
The image is stored in the /server/public/images directory. For now, I have a single image. And, I’m going to “hack” the response to always return the same image.
Here are some code snippets from the /server/src/api/hero.ts file:
/**
 * @class HerosApi
 */
export class HerosApi {

  /**
   * Create the api.
   * @static
   */
  public static create(router: Router) {
    // code omitted

    router.get("/heros/image/:id([0-9a-f]{24})", (req: Request, res: Response, next: NextFunction) => {
      new HerosApi().getImage(req, res, next);
    });
  }

  /**
  * Get a hero image.
  * @param req {Request} The express request object.
  * @param res {Response} The express response object.
  * @param next {NextFunction} The next function to continue.
  */
  public getImage(req: Request, res: Response, next: NextFunction) {
    // verify the id parameter exists
    const PARAM_ID: string = "id";
    if (req.params[PARAM_ID] === undefined) {
      res.sendStatus(404);
      next();
      return;
    }

    // get id
    const id: string = req.params[PARAM_ID];

    // get hero
      Hero.findById(id).then(hero => {

      // verify hero was found
      if (hero === null) {
        res.sendStatus(404);
        next();
        return;
      }

      // always return captain america
      // this is not what you would normally do
      res.sendFile(path.resolve(__dirname,"../../public/images/captain-america.jpg"), next);
    }).catch(next);
  }
}
To quickly review:
- I have created a
HerosApiclass that will serve as a REST endpoint at /api/heros. - There are routes to respond to DELETE, GET, PUT and POST requests.
- The
getImage()method will send the image binary data using thesendFile()method. Note that this is where I hacked this to always return the same file. Likely, your application would retreive an image (or file blob) based on the request data.
Client
The Angular client application is stored within the root /client directory. I have a single heros module that is lazy loaded. Within the heros module we have two routes:
- /heros
- /heros/hero/:id
Further, I have a HerosService that is located at /client/src/app/core/services/heros.service.ts that uses the HttpClient to GET our heros, and to GET a hero image.
Let’s look at the getImage() method:
public getImage(hero: Hero): Observable<Blob> {
  return this.httpClient
    .get(`${this.URL}/image/${hero._id}`, {
      responseType: "blob"
    });
}
Note the responseType property is set to “blob”.
Further, also note that the return type of the method is Observable<Blob>.
Next, let’s take a look at the very simple HTML template for the HeroComponent:
<app-layout>
  <h1>{{ (hero | async)?.name }}</h1>
  <img #heroImage />
</app-layout>
Note the #heroImage template reference variable.
Over in our component we will use the ViewChild() decorator to get access to the <img> native element.
Finally, let’s look at the HeroComponent:
import { Component, ElementRef, OnDestroy, OnInit, ViewChild } from '@angular/core';
import { ActivatedRoute } from "@angular/router";
import { Observable } from "rxjs/Observable";
import { Store } from "@ngrx/store";
import { State, getHero, getImage } from "../../app.reducers";
import { Hero } from "../../models/hero";
import { LoadHeroAction, LoadHeroImageAction } from "../heros.actions";
import { WindowRefService } from "../../core/services/window.service";

import "rxjs/add/operator/do";
import "rxjs/add/operator/filter";
import "rxjs/add/operator/share";
import "rxjs/add/operator/takeWhile";

@Component({
  templateUrl: './hero.component.html',
  styleUrls: ['./hero.component.scss']
})
export class HeroComponent implements OnDestroy, OnInit {

  public hero: Observable<Hero>;

  @ViewChild("heroImage") image: ElementRef;

  private _window: Window;

  private alive = true;

  constructor(
    private activatedRoute: ActivatedRoute,
    private store: Store<State>,
    private windowRefService: WindowRefService
  ) { }

  ngOnDestroy() {
    this.alive = false;
  }

  ngOnInit() {
    this._window = this.windowRefService.nativeWindow;

    this.hero = this.activatedRoute.paramMap
    .takeWhile(() => this.alive)
    .do(params => {
      this.store.dispatch(new LoadHeroAction({ id: params.get("id") }))
    })
    .switchMap(() => this.store.select(getHero))
    .share();

    const image = this.hero
    .takeWhile(() => this.alive)
    .filter(hero => !!hero)
    .do(hero => this.store.dispatch(new LoadHeroImageAction({ hero: hero })))
    .switchMap(() => this.store.select(getImage))

    image
    .takeWhile(() => this.alive)
    .filter(image => !!image)
    .subscribe(image => {
      this.image.nativeElement.src = this._window.URL.createObjectURL(image)
    })
  }

}
Let’s break this down:
- As a side note, I am using NgRx store for my heros as well as my image. It’s very rudimentary, and it uses the previous version of NgRx (2/3).
- Note the use of the
ViewChild()decorator to obtain theElementRefto the<img>element. - Within the
ngOnInit()lifecycle hook I am getting theherobased on the id parameter. - I
dispatch()theLoadHeroImageActionto the store. In my NgRx effects thegetImage()method is invoked on theHerosService. - The
imageconstant is anObservable<Blob>that is returned from thegetImage()method in theHeroService(). - I then
subscribe()to the observable. Using the URL web API we can generate a URL for theimageblob. - Finally, we set the value of the
srcproperty to the URL for the blob.
Also, note that I am using a WindowRefService that is injected into my constructor() function.
This is to avoid direct access to the URL property on the browser’s globally available window object.
URL Web API
Warning: this solution for displaying an image blob using the HttpClient uses the URL API, which is generally supported by all modern browsers.
Make sure you check caniuse.com browser support for URL to be sure that this solution will work for your application’s users.
