
Part 2: Let’s build an Angular app using Material.
Series
This post is part of a series on building a MEAN app using TypeScript with Angular Material and Reactive programming.
Source Code
You can download the source code and follow along or fork the repository on GitHub:
First, run the gulp tasks, then start the Node.js Express server.
$ gulp
$ chmod +x ./dist/bin/www
$ ./dist/bin/www
Then, serve the Angular client using the CLI:
$ ng serveGoals
Our goals for this series are:
- Create a simple CRUD app similar to the Tour of Heros tutorial app for Angular.
- Create the REST API using Express written in TypeScript with Mongoose for persisting data to MongoDb.
- Use Angular Material and Angular Flex Layout for the UI.
- Use Reactive Extensions for JavaScript, specifically, RxJS and ngrx.
Project Structure
In the first part of this series we built our server in the root server directory using TypeScript and Express. Our server builds using Gulp into the dist directory.
Now, let’s focus on our front-end. All of our front-end code will live in the root client directory:
├── client
│   ├── src
│   │   ├── app
│   │   │   ├── app-routing.module.ts
│   │   │   ├── app.component.html
│   │   │   ├── app.component.scss
│   │   │   ├── app.component.ts
│   │   │   ├── app.module.ts
│   │   │   ├── app.reducers.ts
│   │   │   ├── core
│   │   │   │   └── services
│   │   │   │       ├── heros.service.spec.ts
│   │   │   │       └── heros.service.ts
│   │   │   ├── heros
│   │   │   │   ├── heros-routing.module.ts
│   │   │   │   ├── heros.actions.ts
│   │   │   │   ├── heros.effects.ts
│   │   │   │   ├── heros.module.ts
│   │   │   │   ├── heros.reducers.ts
│   │   │   │   └── index
│   │   │   │       ├── index.component.html
│   │   │   │       ├── index.component.scss
│   │   │   │       ├── index.component.spec.ts
│   │   │   │       └── index.component.ts
│   │   │   ├── models
│   │   │   │   └── hero.ts
│   │   │   └── shared
│   │   │       ├── hero-create-dialog
│   │   │       │   ├── hero-create-dialog.component.html
│   │   │       │   ├── hero-create-dialog.component.scss
│   │   │       │   ├── hero-create-dialog.component.spec.ts
│   │   │       │   └── hero-create-dialog.component.ts
│   │   │       ├── heros-list
│   │   │       │   ├── heros-list.component.html
│   │   │       │   ├── heros-list.component.scss
│   │   │       │   ├── heros-list.component.spec.ts
│   │   │       │   └── heros-list.component.ts
│   │   │       ├── layout
│   │   │       │   ├── layout.component.html
│   │   │       │   ├── layout.component.scss
│   │   │       │   ├── layout.component.spec.ts
│   │   │       │   └── layout.component.ts
│   │   │       ├── shared.actions.ts
│   │   │       ├── shared.module.ts
│   │   │       ├── shared.reducers.ts
│   │   │       └── toolbar
│   │   │           ├── toolbar.component.html
│   │   │           ├── toolbar.component.scss
│   │   │           ├── toolbar.component.spec.ts
│   │   │           └── toolbar.component.ts
│   │   ├── environments
│   │   │   ├── environment.prod.ts
│   │   │   └── environment.ts
│   │   ├── index.html
│   │   ├── main.ts
│   │   ├── polyfills.ts
│   │   ├── styles.scss
│   │   └── tsconfig.app.json
│   ├── tsconfig.json
│   └── tslint.json
├── dist
├── gulpfile.js
├── gulpfile.ts
├── package.json
└── server
Review
In the first part of the series, we:
- Installed Node.js and npm using Homebrew.
- Installed Gulp along with several plugins to automate our workflow.
- Installed Express and the necessary middleware for our application.
- Created the www binary to execute Express on Node.js.
- Created the
Serverclass that will create our Express application and wire up the middleware. - Installed MongoDb using Homebrew.
- Installed Mongoose and defined our initial
Herointerface, schema and model. - Tested our REST API using mocha, chai, chai-http and mocha-typescript.
In the second part of this series we will:
- Create a new Angular application.
- Install and configure Angular Material.
- Use Sass instead of CSS.
Install Angular
With our server setup completed, our REST API created and our tests passing, we are now ready to get into the client side of our application.
First, we need to install all of the Angular production dependencies:
$ npm install @angular/animations@latest @angular/common@latest @angular/compiler@latest @angular/core@latest @angular/forms@latest @angular/http@latest @angular/platform-browser@latest @angular/platform-browser-dynamic@latest @angular/router@latest core-js@latest rxjs@latest zone.js@latest --saveNext, install the Angular development dependencies:
$ npm install @angular/cli@latest @angular/compiler-cli@latest @angular/language-service@latest @types/jasmine@latest @types/node@latest codelyzer@latest jasmine-core@latest jasmine-spec-reporter@latest karma@latest karma-chrome-launcher@latest karma-cli@latest karma-coverage-istanbul-reporter@latest karma-jasmine@latest karma-jasmine-html-reporter@latest protractor@latest ts-node@latest tslint@latest --save-dev.angular-cli.json
Unfortunately, we cannot use the Angular CLI to create a new project, as we already have a project created at this point. So, we’ll create the required files for our Angular app. First, create the .angular-cli.json file in your project’s root directory:
{
  "$schema": "./node_modules/@angular/cli/lib/config/schema.json",
  "project": {
    "name": "mean-material-reactive"
  },
  "apps": [
    {
      "root": "./client/src",
      "outDir": "./dist/client",
      "assets": [
        "assets",
        "favicon.ico"
      ],
      "index": "index.html",
      "main": "main.ts",
      "polyfills": "polyfills.ts",
      "test": "test.ts",
      "tsconfig": "tsconfig.app.json",
      "testTsconfig": "tsconfig.spec.json",
      "prefix": "app",
      "styles": [
        "styles.scss"
      ],
      "scripts": [],
      "environmentSource": "environments/environment.ts",
      "environments": {
        "dev": "environments/environment.ts",
        "prod": "environments/environment.prod.ts"
      }
    }
  ],
  "e2e": {
    "protractor": {
      "config": "./protractor.conf.js"
    }
  },
  "lint": [
    {
      "project": "src/tsconfig.app.json"
    },
    {
      "project": "src/tsconfig.spec.json"
    },
    {
      "project": "e2e/tsconfig.e2e.json"
    }
  ],
  "test": {
    "karma": {
      "config": "./karma.conf.js"
    }
  },
  "defaults": {
    "styleExt": "scss",
    "component": {}
  }
}
A few things to note:
- I updated the
rootvalue to point to the ./client/src folder. - Secondly, I updated the
stylesproperty to use Sass, so the file extension is .scss. - I also updated the
styleExtproperty value to use the scss file extension.
Next, create the client/tsconfig.json file as follows:
{
  "compileOnSave": false,
  "compilerOptions": {
    "outDir": "./dist/out-tsc",
    "baseUrl": "src",
    "sourceMap": true,
    "declaration": false,
    "moduleResolution": "node",
    "emitDecoratorMetadata": true,
    "experimentalDecorators": true,
    "target": "es5",
    "typeRoots": [
      "../node_modules/@types"
    ],
    "lib": [
      "es2016",
      "dom"
    ]
  }
}
/client
The Angular application will reside in a separate directory from our server. If you are following along with this series, then you know that our project has a root server/ directory. Now, let’s create a root client directory for our Angular application:
$ mkdir client
$ cd client
Next, create the client/tslint.json file. This is just copied from the generated file when you use Angular CLI to create a new project:
{
  "rulesDirectory": [
    "node_modules/codelyzer"
  ],
  "rules": {
    "arrow-return-shorthand": true,
    "callable-types": true,
    "class-name": true,
    "comment-format": [
      true,
      "check-space"
    ],
    "curly": true,
    "eofline": true,
    "forin": true,
    "import-blacklist": [
      true,
      "rxjs"
    ],
    "import-spacing": true,
    "indent": [
      true,
      "spaces"
    ],
    "interface-over-type-literal": true,
    "label-position": true,
    "max-line-length": [
      true,
      140
    ],
    "member-access": false,
    "member-ordering": [
      true,
      "static-before-instance",
      "variables-before-functions"
    ],
    "no-arg": true,
    "no-bitwise": true,
    "no-console": [
      true,
      "debug",
      "info",
      "time",
      "timeEnd",
      "trace"
    ],
    "no-construct": true,
    "no-debugger": true,
    "no-duplicate-super": true,
    "no-empty": false,
    "no-empty-interface": true,
    "no-eval": true,
    "no-inferrable-types": [
      true,
      "ignore-params"
    ],
    "no-misused-new": true,
    "no-non-null-assertion": true,
    "no-shadowed-variable": true,
    "no-string-literal": false,
    "no-string-throw": true,
    "no-switch-case-fall-through": true,
    "no-trailing-whitespace": true,
    "no-unnecessary-initializer": true,
    "no-unused-expression": true,
    "no-use-before-declare": true,
    "no-var-keyword": true,
    "object-literal-sort-keys": false,
    "one-line": [
      true,
      "check-open-brace",
      "check-catch",
      "check-else",
      "check-whitespace"
    ],
    "prefer-const": true,
    "quotemark": [
      true,
      "single"
    ],
    "radix": true,
    "semicolon": [
      "always"
    ],
    "triple-equals": [
      true,
      "allow-null-check"
    ],
    "typedef-whitespace": [
      true,
      {
        "call-signature": "nospace",
        "index-signature": "nospace",
        "parameter": "nospace",
        "property-declaration": "nospace",
        "variable-declaration": "nospace"
      }
    ],
    "typeof-compare": true,
    "unified-signatures": true,
    "variable-name": false,
    "whitespace": [
      true,
      "check-branch",
      "check-decl",
      "check-operator",
      "check-separator",
      "check-type"
    ],
    "directive-selector": [
      true,
      "attribute",
      "app",
      "camelCase"
    ],
    "component-selector": [
      true,
      "element",
      "app",
      "kebab-case"
    ],
    "use-input-property-decorator": true,
    "use-output-property-decorator": true,
    "use-host-property-decorator": true,
    "no-input-rename": true,
    "no-output-rename": true,
    "use-life-cycle-interface": true,
    "use-pipe-transform-interface": true,
    "component-class-suffix": true,
    "directive-class-suffix": true,
    "no-access-missing-member": true,
    "templates-use-public": true,
    "invoke-injectable": true
  }
}
You can customize these linting rules for your project. As I indicated previously, these are the standard linting rules for a new Angular CLI project.
/client/src
Now, create the client/src directory:
$ mkdir src
$ cd src
$ touch main.ts
Then, create our Application’s client/src/main.ts file:
import { enableProdMode } from '@angular/core';
import { platformBrowserDynamic } from '@angular/platform-browser-dynamic';

import { AppModule } from './app/app.module';
import { environment } from './environments/environment';

if (environment.production) {
  enableProdMode();
}

platformBrowserDynamic().bootstrapModule(AppModule);
Next, create the client/src/index.html file:
<!doctype html>
<html lang="en">
  <head>
    <meta charset="utf-8" />
    <title>MEAN Material Reactive App</title>
    <base href="/" />
    <meta name="viewport" content="width=device-width, initial-scale=1" />
    <link rel="icon" type="image/x-icon" href="favicon.ico" />
  </head>
  <body>
    <app-root></app-root>
  </body>
</html>
Next, create the client/src/polyfills.ts file:
/**
 * This file includes polyfills needed by Angular and is loaded before the app.
 * You can add your own extra polyfills to this file.
 *
 * This file is divided into 2 sections:
 *   1. Browser polyfills. These are applied before loading ZoneJS and are sorted by browsers.
 *   2. Application imports. Files imported after ZoneJS that should be loaded before your main
 *      file.
 *
 * The current setup is for so-called "evergreen" browsers; the last versions of browsers that
 * automatically update themselves. This includes Safari >= 10, Chrome >= 55 (including Opera),
 * Edge >= 13 on the desktop, and iOS 10 and Chrome on mobile.
 *
 * Learn more in https://angular.io/docs/ts/latest/guide/browser-support.html
 */

/***************************************************************************************************
 * BROWSER POLYFILLS
 */

/** IE9, IE10 and IE11 requires all of the following polyfills. **/
// import 'core-js/es6/symbol';
// import 'core-js/es6/object';
// import 'core-js/es6/function';
// import 'core-js/es6/parse-int';
// import 'core-js/es6/parse-float';
// import 'core-js/es6/number';
// import 'core-js/es6/math';
// import 'core-js/es6/string';
// import 'core-js/es6/date';
// import 'core-js/es6/array';
// import 'core-js/es6/regexp';
// import 'core-js/es6/map';
// import 'core-js/es6/weak-map';
// import 'core-js/es6/set';

/** IE10 and IE11 requires the following for NgClass support on SVG elements */
// import 'classlist.js';  // Run `npm install --save classlist.js`.

/** IE10 and IE11 requires the following to support `@angular/animation`. */
// import 'web-animations-js';  // Run `npm install --save web-animations-js`.

/** Evergreen browsers require these. **/
import 'core-js/es6/reflect';
import 'core-js/es7/reflect';

/** ALL Firefox browsers require the following to support `@angular/animation`. **/
// import 'web-animations-js';  // Run `npm install --save web-animations-js`.

/***************************************************************************************************
 * Zone JS is required by Angular itself.
 */
import 'zone.js/dist/zone'; // Included with Angular CLI.

/***************************************************************************************************
 * APPLICATION IMPORTS
 */

/**
 * Date, currency, decimal and percent pipes.
 * Needed for: All but Chrome, Firefox, Edge, IE11 and Safari 10
 */
// import 'intl';  // Run `npm install --save intl`.
/**
 * Need to import at least one locale-data with intl.
 */
// import 'intl/locale-data/jsonp/en';
Then, create the client/src/tsconfig.app.json file:
{
  "extends": "../tsconfig.json",
  "compilerOptions": {
    "outDir": "../out-tsc/app",
    "module": "es2015",
    "baseUrl": "",
    "types": []
  },
  "exclude": [
    "test.ts",
    "**/*.spec.ts"
  ]
}
Finally, stub out the client/src/styles.scss file:
$ touch styles.scss/client/src/environments
Next, create the client/src/environments directory:
$ mkdir environments
$ touch environment.prod.ts
$ touch environment.ts
Within the client/src/environments directory we will create two new files, environment.prod.ts and environment.ts. Here is what the environment.prod.ts file looks like:
export const environment = {
  production: true,
};
And, here is the contents of the environment.ts file:
export const environment = {
  production: false,
};
/client/src/app
Next, create the client/src/app directory:
$ mkdir app
$ cd app
$ touch app.module.ts
The app directory is where most of the code for our application will live.
The first step to building an Angular application is to create the AppModule class.
To do that, create the client/src/app/app.module.ts file that defines the AppModule class:
import { enableProdMode } from '@angular/core';
import { platformBrowserDynamic } from '@angular/platform-browser-dynamic';

import { AppModule } from './app/app.module';
import { environment } from './environments/environment';

if (environment.production) {
  enableProdMode();
}

platformBrowserDynamic().bootstrapModule(AppModule);
Next, create the client/src/app/app.component.ts file that defines the AppComponent class:
import { Component } from '@angular/core';

@Component({
  selector: 'app-root',
  templateUrl: './app.component.html',
  styleUrls: ['./app.component.scss'],
})
export class AppComponent {
  title = 'app';
}
For now, our AppComponent class is pretty empty.
Note that the selector matches the <app-root> element that we included in the client/src/index.html file.
Also note that the templateUrl property references an HTML template file, and the styleUrls property references a Sass file; both of which we will create next.
Let’s create our client/src/app/app.component.html file next:
<h1>{{ title }}</h1>Our app.component.html template is pretty basic at this point.
We are simply referencing the public title property that we defined in the AppComponent class.
Next, stub out the client/src/app/app.component.scss file:
$ touch app.component.scss$ ng serve
If everything goes well, you should now be able to start up the Angular CLI development server:
$ ng serveMake sure you run this from your project’s root directory.
Install Material
Now we’re ready to install Angular Material:
$ npm install @angular/material --save
$ npm install @angular/cdk --save
$ npm install @angular/animations --save
Next, we need to open the client/src/app/app.module.ts file and import the BrowserAnimationsModule module.
We also include a reference to this module in the imports array.
The AppModule class should now look like this:
import { BrowserModule } from '@angular/platform-browser';
import { NgModule } from '@angular/core';
import { BrowserAnimationsModule } from '@angular/platform-browser/animations';
import { AppComponent } from './app.component';

@NgModule({
  declarations: [AppComponent],
  imports: [BrowserAnimationsModule, BrowserModule],
  providers: [],
  bootstrap: [AppComponent],
})
export class AppModule {}
Next, let’s import a theme for our app by adding a prebuilt theme to the client/src/styles.scss file:
@import '~@angular/material/prebuilt-themes/deeppurple-amber.css';

body {
  margin: 0;
}
Finally, we are also going to include the Material icons by adding a stylesheet to the client/src/index.html file.
Just include this in the <head> of your HTML template.
<link
  href="https://fonts.googleapis.com/icon?family=Material+Icons"
  rel="stylesheet"
/>
Add MdToolbarModule
Now that we have Angular Material installed and ready to go, let’s start building our application’s interface.
We’ll start by using the <md-toolbar> directive.
First, modify the client/src/app/app.module.ts file to import the MdToolbarModule module:
import { MdToolbarModule } from '@angular/material';Then, import the module in your AppModule:
@NgModule({
  declarations: [AppComponent],
  imports: [BrowserAnimationsModule, BrowserModule, MdToolbarModule],
  providers: [],
  bootstrap: [AppComponent],
})
export class AppModule {}
Note that I added the MdToolbarModule to the imports property for the module decorator.
We’ll be doing these two steps a bunch of times as we import each module from the Angular Material library that our application needs.
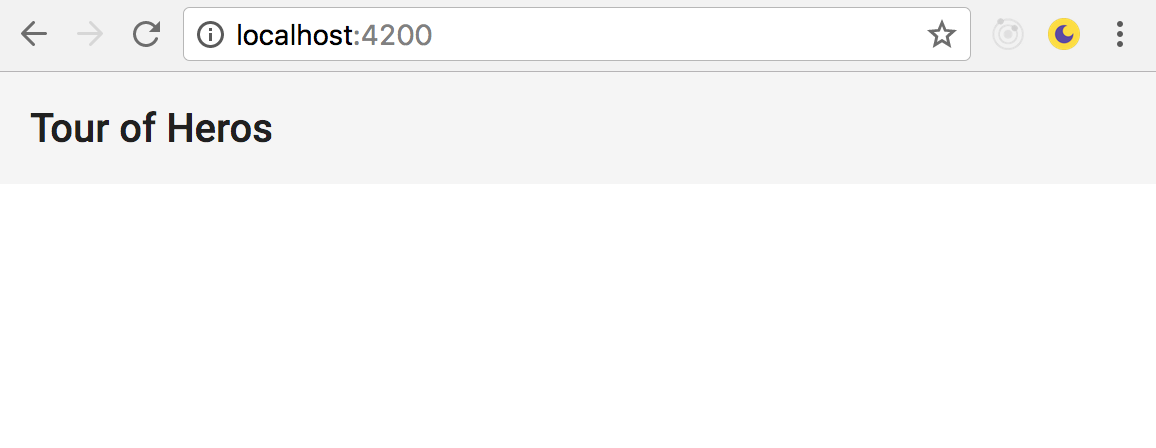
Then, let’s modify our client/src/app/app.component.html template:
<md-toolbar> {{ title }} </md-toolbar>And, we’ll also go ahead and modify the title property of our AppComponent in client/src/app/app.component.ts:
export class AppComponent {
  title = 'Tour of Heros';
}
Go ahead and build your app using the Angular CLI $ ng serve command.
You should see:
Flex Layout
If you are not familiar with Flex Layout, it is simply a set of static and responsive directives that we can use in our Angular application to make working with Flexbox a breeze. Let’s go ahead and install Flex Layout:
$ npm install @angular/flex-layout --saveFor now we will not import the FlexLayoutModule into our code.
We’ll see how we import this into our application’s modules in the next part of this series.
Continue Series
I hope you have enjoyed the second part in the series on building a MEAN app using TypeScript with Angular Material and Reactive programming.
Next, in part three of the series, we’ll continue to build our application using reactive programming with RxJS and ngrx.