
MongoDB is an excellent choice for persisting data for your web application that uses the Express engine on Node.js.
In fact, Express has documentation on getting started with MongoDB. I recommend you check that out as well.
I love JavaScript, including plain ‘ole vanilla JS. But, I also love TypeScript. :)
In this post I am going to show you how to get started with MongoDB and mongoose in your Express web application. I’ll be using TypeScript 2, which is a superset of JavaScript. I will also use the Mocha testing framework with Chai assertions to create a unit test for our interfaces, schemas and models for mongoose.
Let’s dive in.
Source Code
You can download the source code and follow along or fork the repository on GitHub:
Project Structure
I am going to be extending my TypeScript 2 + Express Starter Kit on GitHub. If you are just getting started with TypeScript 2 to develop an Express web app then I suggest you check out my article on getting started with TypeScript 2 and Express on Node.js.
Here is what my project structure looks like:
.
├── bin
│   └── www
├── dist
│   ├── interfaces
│   │   └── user.js
│   ├── models
│   │   ├── model.js
│   │   └── user.js
│   ├── routes
│   │   ├── index.js
│   │   └── route.js
│   ├── schemas
│   │   └── user.js
│   ├── server.js
│   ├── test
│   │   └── user.js
│   └── views
│       └── index.pug
├── gruntfile.js
├── package.json
├── public
├── src
│   ├── interfaces
│   │   └── user.ts
│   ├── models
│   │   ├── model.ts
│   │   └── user.ts
│   ├── npm-debug.log
│   ├── routes
│   │   ├── index.ts
│   │   └── route.ts
│   ├── schemas
│   │   └── user.ts
│   ├── server.ts
│   └── test
│       └── user.ts
└── views
    └── index.pug
Install MongoDB and mongoose
OK, let’s install MongoDB. I am going to be using Homebrew:
$ brew update
$ brew install mongodb
$ ln -sfv /usr/local/opt/mongodb/*.plist ~/Library/LaunchAgents
The last line will copy the homebrew.mxcl.mongodb.plist file so that MongoDB is started when you login.
Now, let’s install mongoose. I will be using the --save flag to write the dependency into my project’s package.json file.
$ npm install mongoose --save
$ npm install @types/mongoose --save-dev
$ npm install @types/mongodb --save-dev
Interface
Next, create a new interface for your collection.
In this tutorial I am going to be using a collection named users.
Therefore, I am going to create a new IUser interface.
Create a new file src/interfaces/user.ts:
export interface IUser {
  email?: string;
  firstName?: string;
  lastName?: string;
}
Schema
Now, create a new schema for a user called userSchema.
Create a new file src/schemas/user.ts:
import { Schema } from 'mongoose';

export var userSchema: Schema = new Schema({
  createdAt: Date,
  email: String,
  firstName: String,
  lastName: String,
});
userSchema.pre('save', function (next) {
  if (!this.createdAt) {
    this.createdAt = new Date();
  }
  next();
});
Some things to note:
- First, I import the
Schemaclass from the mongoose package. - Next I create a new instance of
Schemaand call ituserSchema. Note that I export this object from this package. - I am then creating a pre-save hook (or middleware) to set the value of the
createdAtproperty to the current time.
Model
Next we are going to create two new interfaces for our model:
IUserModelwill serve as the model interface for the users collection.IModelwill serve as the interface for all models in our application.
Create a new file src/models/user.ts:
import { Document } from 'mongoose';
import { IUser } from '../interfaces/user';

export interface IUserModel extends IUser, Document {
  //custom methods for your model would be defined here
}- First, I am importing the
Documentinterface from the mongoose package. - I then import the
IUserinterface we created. - I then define a new interface named
IUserModel. It extends both theIUserinterface we created as well as theDocumentinterface provided by mongoose.
Create a new file src/models/model.ts:
import { Model } from 'mongoose';
import { IUserModel } from './user';

export interface IModel {
  user: Model<IUserModel>;
}
For right now my application only has a single model named user that is of type Model<IUserModel>.
That means that the user property is Model of type IUserModel.
We will use this model to create/edit/delete documents within our users collection.
Install q (optional)
I am going to the using Q for the promise library in mongoose.
To use the q library we need to first install it via npm:
npm install q --saveIn the next section I will wire this up with mongoose.
Update Server
OK, we have setup all of the interfaces for our schema and model.
We are now ready to import these into our Server class.
Here is my updated src/server.ts file:
import * as bodyParser from "body-parser";
import * as cookieParser from "cookie-parser";
import * as express from "express";
import * as logger from "morgan";
import * as path from "path";
import errorHandler = require("errorhandler");
import methodOverride = require("method-override");
import mongoose = require("mongoose"); //import mongoose

//routes
import { IndexRoute } from "./routes/index";

//interfaces
import { IUser } from "./interfaces/user"; //import IUser

//models
import { IModel } from "./models/model"; //import IModel
import { IUserModel } from "./models/user"; //import IUserModel

//schemas
import { userSchema } from "./schemas/user"; //import userSchema

/**
 * The server.
 *
 * @class Server
 */
export class Server {

  public app: express.Application;

  private model: IModel; //an instance of IModel

  /**
   * Bootstrap the application.
   *
   * @class Server
   * @method bootstrap
   * @static
   * @return {ng.auto.IInjectorService} Returns the newly created injector for this app.
   */
  public static bootstrap(): Server {
    return new Server();
  }

  /**
   * Constructor.
   *
   * @class Server
   * @constructor
   */
  constructor() {
    //instance defaults
    this.model = Object(); //initialize this to an empty object

    //create expressjs application
    this.app = express();

    //configure application
    this.config();

    //add routes
    this.routes();

    //add api
    this.api();
  }

  /**
   * Create REST API routes
   *
   * @class Server
   * @method api
   */
  public api() {
    //empty for now
  }

  /**
   * Configure application
   *
   * @class Server
   * @method config
   */
  public config() {
    const MONGODB_CONNECTION: string = "mongodb://localhost:27017/heros";

    //add static paths
    this.app.use(express.static(path.join(__dirname, "public")));

    //configure pug
    this.app.set("views", path.join(__dirname, "views"));
    this.app.set("view engine", "pug");

    //mount logger
    this.app.use(logger("dev"));

    //mount json form parser
    this.app.use(bodyParser.json());

    //mount query string parser
    this.app.use(bodyParser.urlencoded({
      extended: true
    }));

    //mount cookie parker
    this.app.use(cookieParser("SECRET_GOES_HERE"));

    //mount override
    this.app.use(methodOverride());

    //use q promises
    global.Promise = require("q").Promise;
    mongoose.Promise = global.Promise;

    //connect to mongoose
    let connection: mongoose.Connection = mongoose.createConnection(MONGODB_CONNECTION);

    //create models
    this.model.user = connection.model<IUserModel>("User", userSchema);

    // catch 404 and forward to error handler
    this.app.use(function(err: any, req: express.Request, res: express.Response, next: express.NextFunction) {
        err.status = 404;
        next(err);
    });

    //error handling
    this.app.use(errorHandler());
  }

  /**
   * Create and return Router.
   *
   * @class Server
   * @method config
   * @return void
   */
  private routes() {
    let router: express.Router;
    router = express.Router();

    //IndexRoute
    IndexRoute.create(router);

    //use router middleware
    this.app.use(router);
  }

}
Let’s take a closer look at the changes to our Server class.
imports
import mongoose = require("mongoose"); //import mongoose

//interfaces
import { IUser } from "./interfaces/user"; //import IUser

//models
import { IModel } from "./models/model"; //import IModel
import { IUserModel } from "./models/user"; //import IUserModel

//schemas
import { userSchema } from "./schemas/user"; //import userSchema
The first thing we need to do is to import the mongoose package.
Then we import the IUser interface as well as the IModel and IUserModel interfaces that we created.
And then import the userSchema, which we will use to create a new model() in mongoose.
We will wire up our connection to MongoDB and the models in the config() method.
model Property
I am then creating a new private property within the Server class called model.
This object will be of type IModel, which we defined earlier in the src/interfaces/model.ts file.
I set this to a new Object in the constructor function.
/**
 * The server.
 *
 * @class Server
 */
export class Server {

  private model: IModel; //an instance of IModel

  /**
   * Constructor.
   *
   * @class Server
   * @constructor
   */
  constructor() {
    //instance defaults
    this.model = Object(); //initialize this to an empty object

    //code omitted
  }
}
Updating config()
Finally we are ready to setup the connection to our MongoDB server that we installed locally.
As I stated previously, I am going to use the q promise library for mongoose promises.
/**
   * Configure application
   *
   * @class Server
   * @method config
   */
  public config() {
    const MONGODB_CONNECTION: string = "mongodb://localhost:27017/heros";

    //code omitted

    //use q promises
    global.Promise = require("q").Promise;
    mongoose.Promise = global.Promise;

    //connect to mongoose
    let connection: mongoose.Connection = mongoose.createConnection(MONGODB_CONNECTION);

    //create models
    this.model.user = connection.model<IUserModel>("User", userSchema);

    //code omitted
  }
}
A couple of things to note:
- First, I define a constant for the MongoDB connection string. This is just an example. I would highly recommend that you put this in some sort of configuration object that depends on the environment you are running your server in. This way you can run your server locally and test against a local MongoDB installation. And then when you are ready to go to production you can have your production server(s) hit a production MongoDB installation.
- Note that in the connection string I am specifying the DB name as “heros”.
- Next I import the
qpromise library. I am going to use this as the global promise library in my Node.js application as well as for mongoose promises. - I then create a new connection via the
createConnection()method passing in the connection string. - Finally I create a new
model()instance specifying the singular name of the collection in MongoDB along with theUserSchemathat defines the schema for our users collection.
Testing with Mocha and Chai
To test our models I will be using Mocha with Chai as the assertion library.
Mocha is a test framework that is very popular for Node.js development.
Chai is an assertion library that includes methods like expect() and assert().
We could use node’s assert module but I prefer the style of chai.
Let’s go ahead and install Mocha and Chai via npm:
$ npm install mocha --save-dev
$ npm install chai --save-dev
$ npm install @types/mocha --save-dev
$ npm install @types/chai --save-dev
Next, I am going to modify my package.json file to add a custom test script:
{
  "name": "heros",
  "description": "The tour of heros",
  "version": "1.0.0",
  "private": true,
  "author": "Brian Love",
  "scripts": {
    "dev": "NODE_ENV=development nodemon ./bin/www",
    "grunt": "grunt",
    "test": "mocha dist/test",
    "start": "node ./bin/www"
  },
  //code omitted
}
Executing npm test will invoke our tests.
Create Test
NOTE: I have updated this post to use the mocha-typescript module. This takes advantage of decorators in TypeScript and can make your tests easier to write. So, you might want to skip down the next section to create the test using mocha-typescript.
With Mocha and Chai installed create a new file at src/test/user.ts:
import "mocha";
import { IUser } from "../interfaces/user";
import { IUserModel } from "../models/user";
import { userSchema } from "../schemas/user";

//use q promises
global.Promise = require("q").Promise;

//import mongoose
import mongoose = require("mongoose");

//use q library for mongoose promise
mongoose.Promise = global.Promise;

//connect to mongoose and create model
const MONGODB_CONNECTION: string = "mongodb://localhost:27017/heros";
let connection: mongoose.Connection = mongoose.createConnection(MONGODB_CONNECTION);
var User: mongoose.Model<IUserModel> = connection.model<IUserModel>("User", userSchema);

//require chai and use should() assertions
let chai = require("chai");
chai.should();

describe("User", function() {

  describe("create()", function () {
    it("should create a new User", function () {
      //user object
      let user: IUser = {
        email: "foo@bar.com",
        firstName: "Brian",
        lastName: "Love"
      };

      //create user and return promise
      return new User(user).save().then(result => {
        //verify _id property exists
        result._id.should.exist;

        //verify email
        result.email.should.equal(user.email);

        //verify firstName
        result.firstName.should.equal(user.firstName);

        //verify lastName
        result.lastName.should.equal(user.lastName);
      })
    });
  });
});
There is a bit of ceremony at the top of our test.
I’m not going to cover it in detail.
I import our necessary modules, classes and functions.
I then configure mongoose to use the Q library for promises, create the connection to MongoDB and create the User model.
The important part is the test that “should create a new user”:
- First, I create a new
userobject that is aIUser. I set the values for theemail,firstNameandlastNameproperties. - Next, I create a
new User()passing in theuserobject. I then invoke thesave()method to save the new document I just created. Then I invoke thethen()promise object method. - Note that I return the result of the
then()method, which is a promise object. I am using the asynchronous promise approach with chai. When using this approach we can simply return a promise object rather than invoking thedone()callback method (the more traditional approach to using mocha). - Within the
then()resolution callback function I first verify that the_idproperty exists in theresult, which is theIUserModeldocument that is returned after saving the document into our MongoDB users collection. - I then verify that the value of the
email,firstNameandlastNamevalues match that of theuserobject.
OK, let’s run the test:
$ npm run grunt
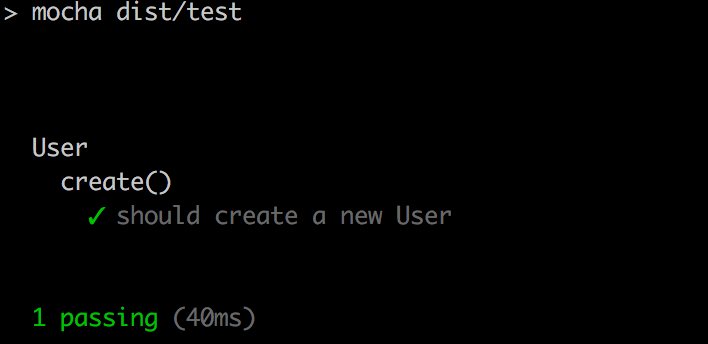
$ npm testIf all goes well then you should see a success message:
Using mocha-typescript [Updated 2016-11-28]
Thank you to Michal who recommended using “a more TypeScript approach” to creating my tests using the project mocha-typescript.
To get started with mocha-typescript install it via npm:
$ npm install mocha-typescript --save-devThe mocha-typescript module includes several decorators that implement the Mocha interfaces.
The first decorator that we use is the @suite decorator that implements the Mocha.IContextDefinition interface.
Previously I used Mocha’s describe() method:
describe('User', function () {
  //tests
});
Using mocha-typescript I created a UserTest class that is decorated with the @suite decorator:
@suite
class UserTest {
  //tests
}
The next decorator that we use is the @test decorator that implements the Mocha.ITestDefinition interface.
Previously I used Mocha’s it() method:
describe('User', function () {
  it('should create a new User', function () {
    //code that returns a Promise object
  });
});
Using mocha-typescript we can add methods that are decorated with the @test decorator:
@suite class UserTest {

  @test("should create a new User")
  public create() {
    //code that returns a Promise object
  }

}
Note that a decorator does not end with a semi-colon.
If you are getting compilation error error TS1146: Declaration expected then this is likely due to ending your decorator with a semi-colon.
Here is the complete code for my UserTest class using mocha-typescript:
import { suite, test } from "mocha-typescript";
import { IUser } from "../interfaces/user";
import { IUserModel } from "../models/user";
import { userSchema } from "../schemas/user";
import mongoose = require("mongoose");

@suite
class UserTest {

  //store test data
  private data: IUser;

  //the User model
  public static User: mongoose.Model<IUserModel>;

  public static before() {
    //use q promises
    global.Promise = require("q").Promise;

    //use q library for mongoose promise
    mongoose.Promise = global.Promise;

    //connect to mongoose and create model
    const MONGODB_CONNECTION: string = "mongodb://localhost:27017/heros";
    let connection: mongoose.Connection = mongoose.createConnection(MONGODB_CONNECTION);
    UserTest.User = connection.model<IUserModel>("User", userSchema);

    //require chai and use should() assertions
    let chai = require("chai");
    chai.should();
  }

  constructor() {
    this.data = {
      email: "foo@bar.com",
      firstName: "Brian",
      lastName: "Love"
    };
  }

  @test("should create a new User")
  public create() {
    //create user and return promise
    return new UserTest.User(this.data).save().then(result => {
      //verify _id property exists
      result._id.should.exist;

      //verify email
      result.email.should.equal(this.data.email);

      //verify firstName
      result.firstName.should.equal(this.data.firstName);

      //verify lastName
      result.lastName.should.equal(this.data.lastName);
    });
  }
}
In our updated src/test/user.ts file we are now using the mocha-typescript module and the @suite and @test() decorators.
Some things to note:
- I removed the import of “mocha” and replaced this with an import statement that imports the
suiteandtestdecorators (notice to @-symbol) from the “mocha-typescript” module. - I then created the
UserTestclass. - I have a private variable named
datathat will contain the test data that I will use for the test(s). This is not necessary for the simple implementation in this example, however, it is helpful when you have multiple tests. - Previously I had some setup code outside of the
describe()function (to configure promises and to create a connection to Mongodb using mongoose). I think this is a standard approach using vanilla JS to writing tests with Mocha. However, with mocha-typescript we cand define a staticbefore()method that is invoked before our tests are executed. I moved my setup code into this method. I think this is a bit cleaner. - In the
constructor()function I set the value ofdata. - I have a
create()method that is decorated with the@test()decorator. - The
create()method returns a promise object so that my test is asynchronous. - I am doing some simple verifications using chai should assertions to test the
result.
The last thing to note is that decorators are still experimental in TypeScript. The TypeScript documentation warns us:
NOTE Decorators are an experimental feature that may change in future releases.
To enable this experimental feature we need to set a compiler flag named experimentalDecorators to true.
In my sample project I am using Grunt to compile the TypeScript in the src directory to the dist directory.
I have a gruntfile.js file that uses the grunt-ts task to compile the TypeScript to ES6 compatible JavaScript.
Using grunt-ts we can simply add a flag to the options:
ts: {
  app: {
    files: [{
      src: ["src/\*\*/\*.ts", "!src/.baseDir.ts"],
      dest: "./dist"
    }],
    options: {
      experimentalDecorators: true,
      module: "commonjs",
      target: "es6",
      sourceMap: false
    }
  }
}
Note that I have set experimentalDecorators to true.
Now we are ready to build and run our tests:
$ npm run grunt
$ npm test
If you are using the tsc command line to compile your TypeScript then you must use the experimentalDecorators flag (along with the ES5 or greater target):
tsc --target ES5 --experimentalDecoratorsMongoclient
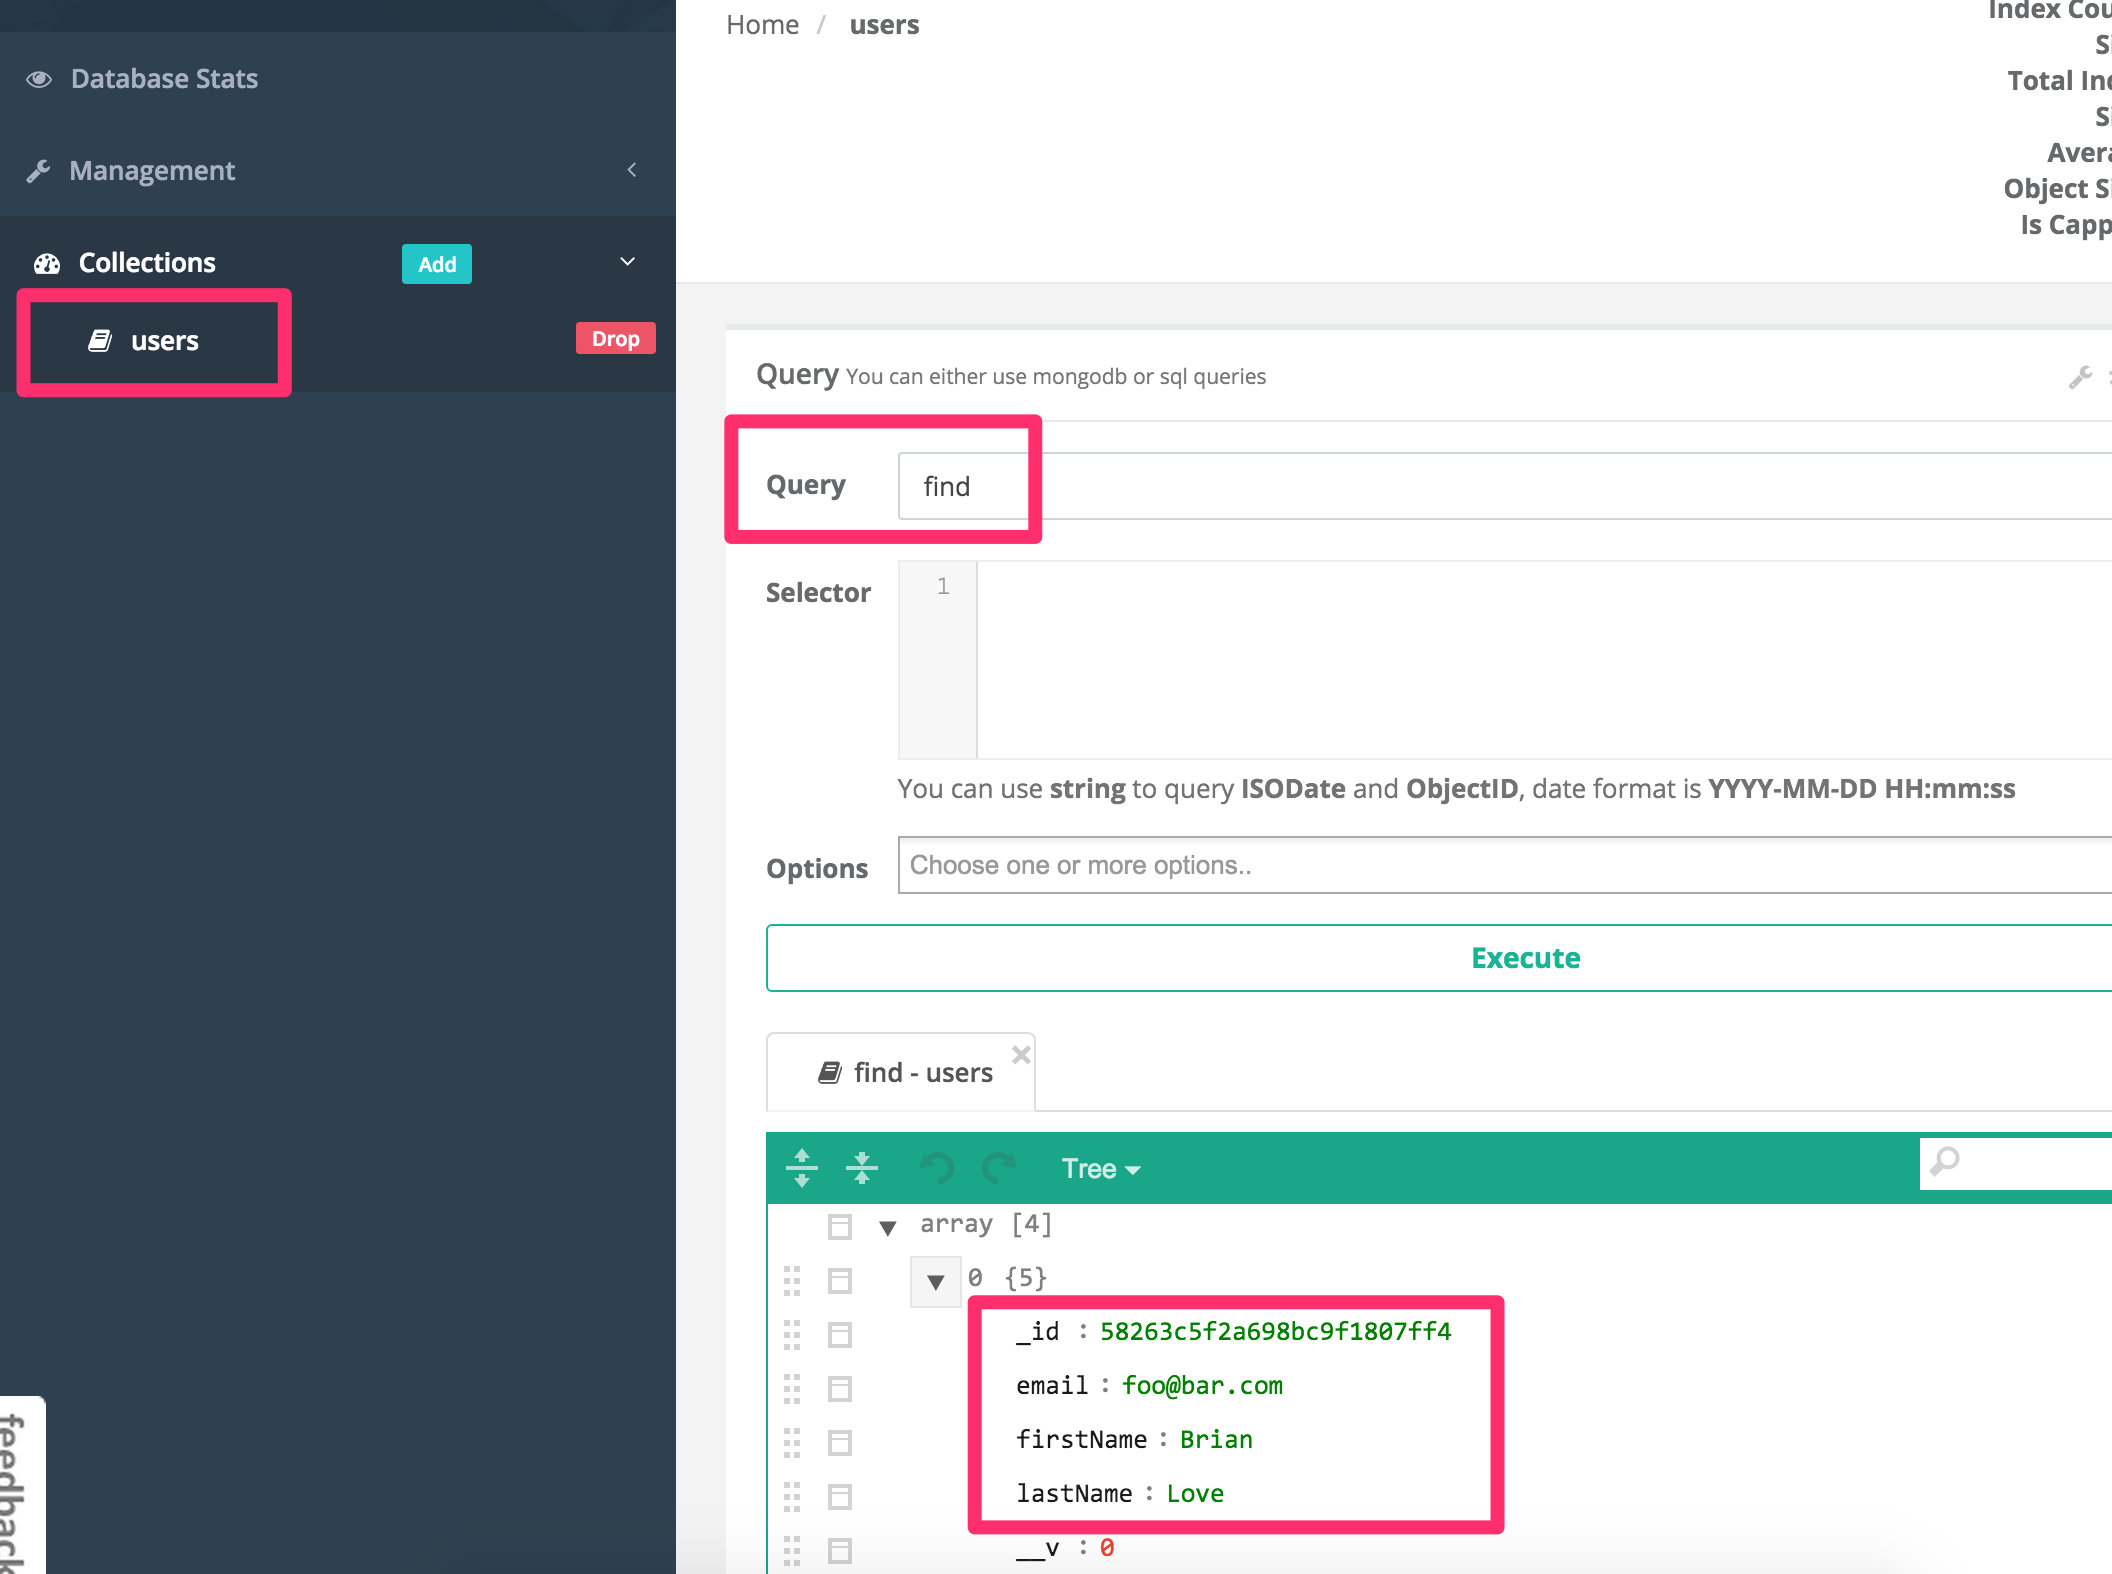
In case you want to test that your connection to MongoDB is working using more of a GUI approach then check out Mongoclient. After you install it you will need to configure a connection to MongoDB on localhost and set the DB to “heros”. If you look back at the connection string for MongoDB I used “heros” as the DB name.
Here is a screen shot of Mongoclient showing the document that I created when executing the test:
Source Code
You can download the source code and follow along or fork the repository on GitHub:
The source code for this tutorial is a branch named 1-mongodb off of my TypeScript 2 + Express Starter Kit