
Web Development with Apache + PHP on OS X Mavericks
Getting your web development environment set up on OS X Mavericks is very similar to setting it up on Mountain Lion or other previous releases of Apple’s OS. If you already had your environment set up previously and upgraded to OS X 10.9 (Mavericks) then you will notice that your httpd.conf configuration has been replaced. But, don’t fret. You can find your old configuration located at: /private/etc/apache2/httpd.conf.pre-update. Let’s go ahead and get started!
Apache
OS X comes with Apache already installed, so it’s as simple as starting up the server. Previously, you could start this using the System Preferences > Sharing panel but it has been removed from there in 10.9. To start the server first start up Terminal app via Utilities > Terminal and then enter the command below. You can read the full documentation on the apachectl command.
Start Apache:
$ sudo apachectl startStop Apache:
$ sudo apachectl stopRestart Apache:
$ sudo apachectl restartAnother useful command is to verify your httpd.conf configuration via the -t test switch.
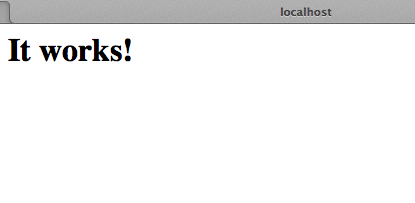
$ sudo apachectl -tOnce you have started the Apache server open your favorite browser to: http://localhost and you should see the screen below.
Customizing Apache
After getting the initial localhost working you may want to make some changes. I suggest:
- Create a /www directory
- Put all your web sites in this directory
- Add virtual hosts for each web site you are working on
- Add an entry to your hosts file to point a local domain name to your local Apache server
First, let’s create the /www directory:
$ cd /
$ mkdir www
Second, let’s create our local web site local.example.com (replace with your own web site):
$ mkdir local.example.comOpen up the httpd.conf file located in /private/etc/acpache2. I am using TextMate, so I will use the “mate” command.
$ mate /private/etc/apache2/httpd.confMake the following changes to the httdp.conf file.
- On line 170, change the DocumentRoot:
DocumentRoot "/www" - On line 197, change the Directory location:
<Directory "/www"> - On line 217 (within the Directory location we just updated), change the AllowOverride value to “All” so that we can use .htaccess to modify any settings for our local sites:
AllowOverride All - On line 429, uncomment the Include of the httpd-vhosts.conf file:
Include /private/etc/apache2/extra/httpd-vhosts.conf
We will also add a new virtual hosts to the httpd-vhosts.conf file located at /private/etc/apache2/extra/httpd-vhosts.conf. If you open this file you will notice that there is already some dummy-host.example.com entries. You can just modify these as necessary for your web site. My virtual host entry looks like this:
<VirtualHost *:80>
	DocumentRoot "/www/local.example.com"
	ServerName local.example.com
	ErrorLog "/private/var/log/apache2/local.example.com-error_log"
	CustomLog "/private/var/log/apache2/local.example.com-access_log" common
</VirtualHost>
The last thing we need to do is modify our hosts file so that when we type in local.example.com into our browser we use the local Apache web server rather than trying to go out find this fictitious domain on the Internet. So, let’s open up the hosts file for editing in TextMate.
$ mate /private/etc/hostsAdd a new entry for your web site:
127.0.0.1 local.example.comPHP
PHP is already installed for you in OS X 10.9 Mavericks. It’s as simple as modifying the httpd.conf file again.
- On line 118, uncomment the LoadModule for PHP:
LoadModule php5_module libexec/apache2/libphp5.so - On line 231, add index.php as a default document if a directory is requested:
DirectoryIndex index.html index.php
Lastly, we need to tell Apache to use the PHP handler when requesting files that end in .php or .phps. Append the following code to the end of your httpd.conf file.
#PHP Settings
<IfModule php5_module>
	AddType application/x-httpd-php .php
	AddType application/x-httpd-php-source .phps
</IfModule>
Don’t forget to restart the Apache server after making any changes to your httpd.conf file.
MySQL
This is an update to the original blog article as I ran into some issues with my MySQL connection after posting this article.
Upgrading also replaces your php.ini file located at /private/etc/php.ini with a new **php.ini.default* file located at **/private/etc/php.ini.default**. To get MySQL working (along with error reporting), I needed to update some settings:
- One line 478, display errors (this is only for development, not a production environment):
display_errors = On - One line 986, add the location to the MySQL socket file:
pdo_mysql.default_socket=/tmp/mysql.sock
If you are running into the same issue you probably need to enable the pdo_mysql extension by uncommenting the line: extension=php\_pdo\_mysql.dll.
That’s it. Happy web developing!